Get 90% — OFF
0
No products in the cart.

Welcome to Shirtsmockup.com Online Apparel PSD Mockup Shopping Store!

Shopping Cart

How to Add a Lining to a Pattern

Jun 03, 2024 / By Mahananda Sarkar / in Jacket

Enhancing your sewing projects with a lining can significantly improve both quality and functionality. Linings offer a polished finish, strengthen the garment's structure, and increase comfort by minimizing friction against the skin. Whether you're crafting a coat, dress, or skirt, mastering the art of adding a lining is a valuable skill that imparts a professional touch to handmade clothing. This guide will lead you through the process, from selecting the ideal fabric to mastering the sewing techniques necessary for a flawless result. Whether you're a beginner or a seasoned sewist, these instructions will enable you to seamlessly incorporate linings into your creations, ensuring they look as impeccable inside as they do outside.

What is a Lining?

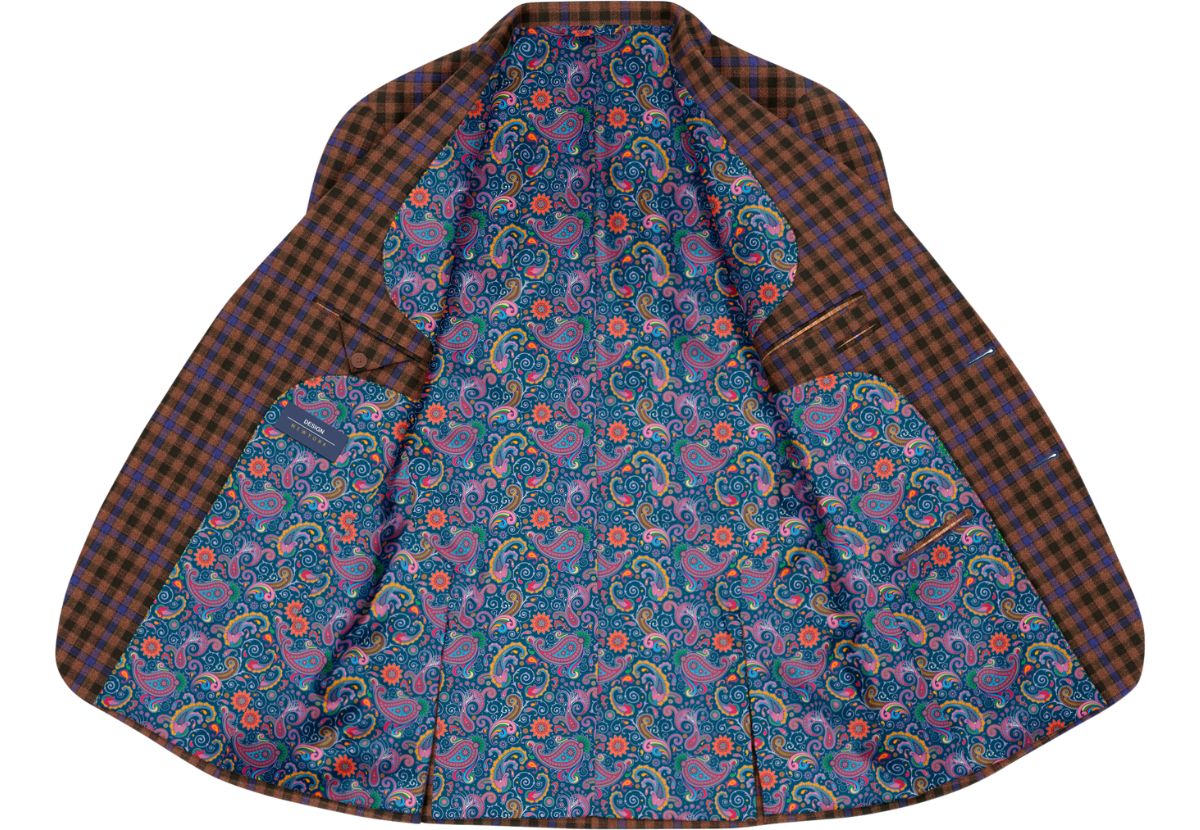
A lining is an additional layer of fabric sewn into a garment to enhance its structure, comfort, and overall appearance. It is typically attached to the inside of the garment, concealing seams and providing a smooth, finished look. Linings can also add warmth, prevent fabric from stretching, and improve the drape of the garment. They are often made from soft materials like silk, polyester, or acetate, ensuring that the garment feels pleasant against the skin.

Also See>>>> How to Make a Lining for a Jacket

Purpose of a Lining:

  • Enhances the garment’s drape and fit.
  • It provides comfort by preventing direct contact between the outer fabric and the skin.
  • Boosts durability by reducing wear on the outer material.
  • It helps maintain the garment’s shape.
  • Adds opacity to sheer fabrics.

Benefits of Adding a Lining:

  • Comfort: Smooth's rough seams and edges against the skin.
  • Durability: Shields the outer fabric from sweat and friction.
  • Structure: Adds body and weight to lightweight or delicate materials.
  • Aesthetics: Offers a polished, professional finish to the garment.

Choosing the Right Fabric for the Lining


lining-mockup-1.jpg


Lining Fabric Choices:

  • Silk: Luxurious, breathable, and smooth. Perfect for premium garments, though it can be costly.
  • Polyester: Durable, budget-friendly, and available in various weights and finishes. However, it lacks the breathability of natural fibers.
  • Cotton is breathable, comfortable, and easy to handle. It is ideal for casual wear, but it can add bulk.

Factors to Consider:

  • Breathability: Opt for natural fibers like silk or cotton for garments worn close to the skin or in warm climates.
  • Weight: Align the lining weight with the outer fabric. Use lightweight linings for delicate fabrics and heavier linings for structured garments.
  • Color: Select a lining color that complements or matches the outer fabric. For sheer fabrics, nude or skin-tone linings are often the best choice.

Preparing Your Pattern and Fabric

Selecting an Appropriate Pattern for Lining:

  • Opt for patterns that include lining instructions or feature simple, clean lines that are easy to line.
  • If necessary, adjust your pattern pieces to incorporate lining, ensuring they align perfectly with the main fabric pieces.

Preparing the Lining Fabric:

  • Pre-wash the lining fabric to prevent shrinkage post-construction.
  • Iron the fabric to eliminate wrinkles, ensuring precise cutting.

Read About: How to add a Lining Tutorial

Cutting Out the Lining Pieces

Step-by-Step Instructions:

  1. Lay your lining fabric flat on a cutting surface.
  2. Position your pattern pieces on the fabric, aligning with the grainline.
  3. Securely pin the pattern pieces to the fabric.
  4. Cut around the pattern pieces using sharp fabric scissors.

Importance of Accuracy:

  • Precise cutting ensures the lining fits seamlessly with the main fabric.
  • Inaccurate cuts can result in misalignment and an unprofessional finish.

Marking Seam Allowances and Notches

Transferring Seam Allowances and Notches:

  • Use fabric chalk or a washable fabric marker to mark seam allowances and notches on the lining pieces.
  • Double-check that all markings are clear and accurate.

Emphasizing Precision:

  • Accurate marking is essential for proper alignment during sewing.
  • Incorrect markings can lead to fitting issues and uneven seams.

Sewing the Lining to the Main Fabric

Attaching the Lining:

  • Pin the lining to the main fabric with the right sides together.
  • Carefully match seams and corners.
  • Sew the lining to the main fabric, maintaining an even seam allowance.

Tips for Matching Seams and Corners:

  • Use plenty of pins to hold the fabric layers securely.
  • Frequently check alignment as you sew to ensure seams match perfectly.

Stitching the Neckline and Armholes

Stitching Process:

  • Pin the lining to the main fabric at the neckline and armholes on the right sides.
  • Sew along the edges, maintaining a consistent seam allowance.

Understitching for a Clean Finish:

  • After sewing, press the seam allowances toward the lining.
  • Stitch the seam allowances to the lining close to the seam line to prevent the lining from rolling to the outside.

Adding a Lining to a Sleeveless Garment

Specific Steps for Sleeveless Garments:

  • Sew the shoulder seams of both the main fabric and lining.
  • With the right sides together, sew the lining to the main fabric at the neckline and armholes.
  • Trim and clip the seam allowances, then turn the garment right side out.

Finishing the Armholes:

  • Use a hand-sewing method or a sewing machine to neatly close the armhole edges.

Lining a Skirt or Dress

Process for Skirts and Dresses:

  • Sew the side seams of both the outer fabric and lining separately.
  • With the right sides together, sew the lining to the outer fabric at the waistband or bodice.
  • Hem the lining separately to prevent it from peeking out from the garment’s hem.

Creating a Bagged Lining

Bagged Lining Technique:

  • Sew the outer fabric and lining together, leaving a small opening.
  • Turn the garment right side out through the opening.
  • Hand-stitch or machine-stitch the opening closed.

Finishing Seams and Edges

Options for Finishing Raw Edges:

  • Serging: Use a serger to finish raw edges quickly and neatly.
  • Bias Binding: Encases raw edges in a strip of fabric for a clean finish.

Importance of Neatness:

  • Neatly finished seams prevent fraying and extend the garment’s life.
  • Professional seam finishes enhance the garment’s overall appearance.

Lining Zippers and Closures

Adding a Lining Around Zippers and Closures:

  • Sew the lining to the garment, leaving the zipper area free.
  • Attach the zipper to the main fabric first, then sew the lining to the zipper tape.

Tips for Invisible Zippers:

  • Press the zipper teeth away from the fabric before sewing.
  • Sew close to the zipper teeth for a clean, invisible finish.

Lining Troubleshooting

Common Issues and Solutions:

  • Twisting Lining: Ensure the lining and main fabric are cut on the same grainline.
  • Puckering: Use a suitable needle and tension for the lining fabric.
  • Misalignment: Double-check pattern pieces and markings for accuracy.

Pressing and Final Touches

Importance of Pressing:

  • Carefully press the lining to remove any wrinkles and set the seams.
  • Pressing ensures the garment has a crisp, professional finish.

Final Adjustments:

  • Check for any loose threads or uneven seams and fix them.
  • Ensure the lining is smooth and lies flat inside the garment.

Read More: Jacket Lining Mockups

Conclusion

Adding a lining to a garment not only enhances its comfort and durability but also gives it a polished, professional look. By carefully selecting the right fabric, preparing your pattern, and following precise sewing techniques, you can achieve beautifully lined garments that look and feel exceptional. Encourage yourself to try lining various projects to elevate your sewing skills and create garments with a high-quality finish.

Loading...