Welcome to Shirtsmockup.com Online Apparel PSD Mockup Shopping Store!
Jun 13, 2024 / By Nayan Ali / in Jacket
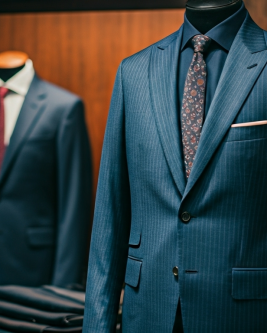
Adding a lining to a jacket can elevate its look and feel while also adding durability and comfort. A well-chosen lining can enhance the overall aesthetic, providing a polished finish that makes the garment look professionally made. It can also offer practical benefits, such as making the jacket easier to put on and take off and providing an extra layer of warmth and protection. Whether you're making a jacket from scratch or updating an old favorite, a well-sewn lining can make all the difference. This guide will walk you through the process step-by-step, covering everything from selecting the right fabric to ensuring a perfect fit. With detailed instructions and helpful tips, this guide is designed to make the process easy for both beginners and seasoned sewists alike. Let's get started!
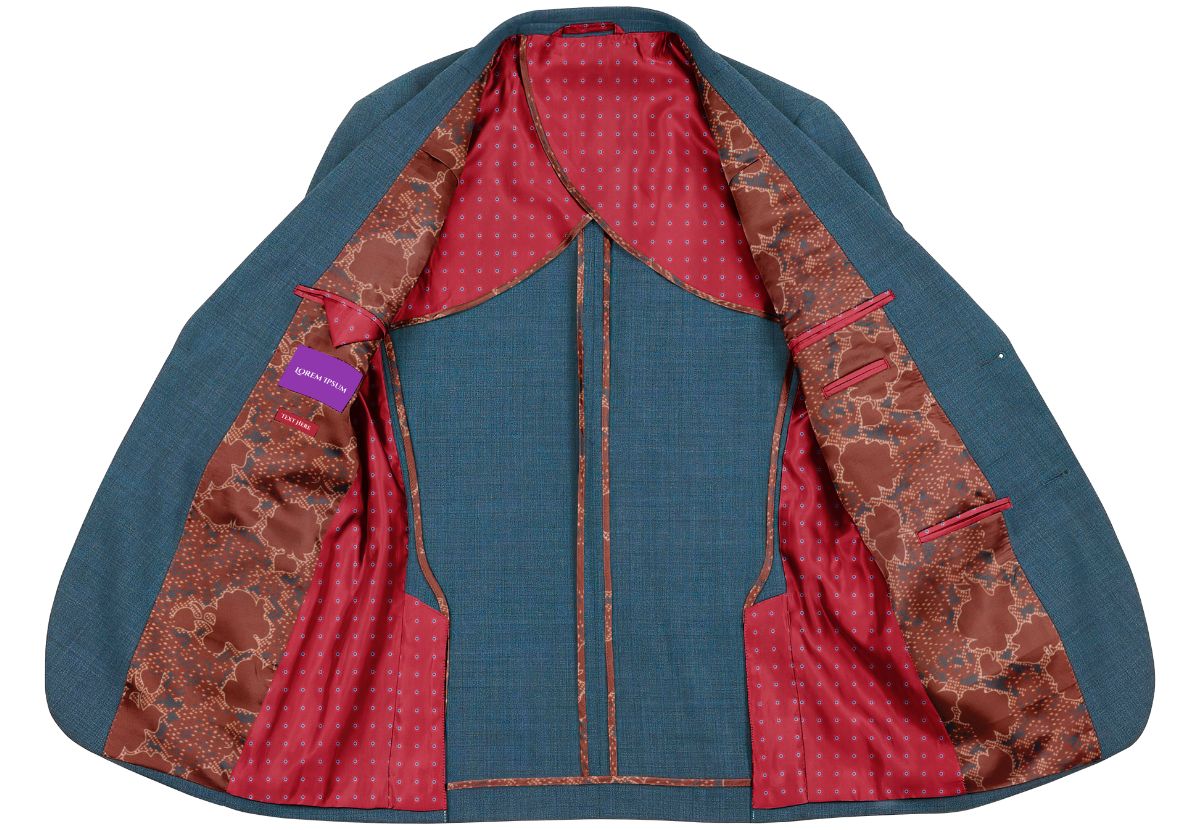
A lining isn't just about looks; it plays several crucial roles in a jacket. First & foremost, it adds an extra layer that can make the jacket more comfortable to wear, providing a smoother feel against the skin. Second, it helps the jacket slide on and off more easily, reducing friction and making it more convenient to use. Third, it can hide the inner seams and stitching, giving the garment a polished and professional appearance. Additionally, a well-chosen lining can add to the aesthetic appeal of a jacket, offering an opportunity for a splash of color or pattern that adds a unique touch to the garment. If you've been wondering if a tailor can add lining to a jacket, the answer is yes—and you can, too! With the right materials and a bit of sewing know-how, you can enhance the functionality and look of your jacket by adding a lining yourself.
The choice of fabric for your jacket lining is critical. Not all fabrics are created equal, and your selection will depend on various factors like breathability, warmth, and durability. The right lining can significantly affect the overall comfort and longevity of your jacket.
Lining fabrics play a crucial role in enhancing the durability, comfort, and appearance of garments. They provide a smooth surface against the skin and help maintain the garment’s shape. Here are some common types of lining fabrics:
2. Polyester
3. Acetate
4. Rayon
5. Cupro (Bemberg)
6. Cotton
7. Nylon
8. Taffeta
9. Satin
10. Twill
11. Fleece
12. Mesh
13. Jersey
14. Wool
Each type of lining fabric boasts specific properties that make it suitable for different applications. The choice of lining material depends on desired characteristics such as comfort, breathability, durability, and aesthetics.
When choosing your lining fabric, consider the climate in which you'll be wearing the jacket. For colder weather, opt for something heavier and more insulated, like a wool blend or quilted lining. These materials provide added warmth and can make a significant difference during winter months. If you live in a warmer climate, a lighter, more breathable fabric like cotton or silk will be more comfortable, preventing you from overheating while still offering some protection.
Before you start, make sure you have all the materials you'll need:
Having these supplies on hand will make the process smoother and more enjoyable. Ensuring you have quality tools can also affect the outcome, so invest in good materials.
Read More: How to Add a Lining to a Pattern
Ensure that the jacket shell is ready to go before you start adding the lining. Check that all seams are securely stitched and hems are finished. This is a crucial step, as any imperfections in the shell will be harder to fix once the lining is attached. Press the shell to remove any wrinkles, as this will make it easier to attach the lining evenly. Taking the time to properly prepare the shell can significantly improve the final look and fit of your jacket.
You'll need to cut the lining pieces based on your jacket pattern.
When cutting, consider making slight adjustments to allow for ease, especially around areas like the arms and shoulders. This will make the jacket more comfortable to wear. Adding a bit of extra fabric in these areas can help ensure that you have enough room for movement, which is especially important if you plan to wear layers underneath your jacket.
Once your lining pieces are cut and ready, it's time to assemble them. Follow your jacket pattern's instructions carefully, sewing the pieces together to form the lining. Pay attention to details, such as seam allowances and finishing techniques, to ensure a professional look. After assembling the lining, please attach it to your jacket shell, making sure everything aligns properly. Press the final garment one more time to remove any wrinkles and to set the seams.
By following these detailed steps, you can create a jacket lining that not only complements your jacket but also enhances its functionality and comfort.
Also See>>> How to Make a Lining for a Jacket
Once your lining pieces are cut, it's time to sew them together.
This will form the basic shape of your jacket lining.
Now, it's time to bring everything together.
This step requires precision, so take your time to ensure everything lines up correctly.
To achieve a clean finish, you'll need to trim any excess fabric, especially around the corners.
This will make it easier to turn the jacket's right side out and achieve crisp edges.
Carefully turn the jacket right side out through the opening you left.
This step will reveal the nearly finished jacket and lining.
With the jacket turned right side out, you'll need to close the opening by hand.
This final touch will complete the main construction of your lined jacket.
Pressing the lining is essential for a professional look.
A well-pressed lining will make your jacket look crisp and polished.
To secure the lining fully, you'll need to attach it to the cuffs and hem.
This step will ensure that the lining stays in place and doesn't shift around.
For the final touches, you can add topstitching and tacking to complete the look.
These finishing touches will give your jacket a professional look and feel.
Even experienced sewists can make mistakes, so here are some common pitfalls to watch out for.
Following these tips can help you avoid common issues and ensure a successful project.
Sewing a lining into a jacket may seem daunting, but with careful planning & attention to detail, it’s a task that anyone can master. Start by selecting a high-quality lining fabric that complements the outer material of your jacket. Measure and cut your lining pieces accurately to ensure a perfect fit. Follow these steps closely, taking your time with each stitch, and you’ll have a beautifully lined jacket that’s both stylish and functional. Don’t hesitate to try it out; the results are well worth the effort! Not only will the lining add a professional finish, but it will also increase the comfort and durability of your jacket, making it a standout piece in your wardrobe.
While it's possible to use the same fabric for both the lining and shell, it's generally better to use different fabrics to optimize the functionality and comfort of the garment. The lining should complement the shell in terms of weight and breathability, ensuring that the jacket is comfortable to wear and moves well with the body.
To sew a lining into a jacket sleeve:
If you don't have a pattern, you can use the existing jacket as a template to create your jacket lining. Lay the jacket flat on the lining fabric and trace around each section of the jacket, including the front, back, and sleeves, adding seam allowances to each piece. Cut out the traced pieces, then sew them together to form the lining before attaching it to the jacket, ensuring all seams align properly.
Jul 20, 2025 by Nayan Ali
Jul 09, 2025 by Nayan Ali